Planting the orchard: One thing to get right when planting a tree
A few months back I started getting ready to plant ten new fruit trees on the allotment. It has been a long process of planning and waiting, but the trees are finally in the ground.
I placed my order back in autumn with the legendary Frank P. Matthews, a tree nursery that is widely considered one of the best in the UK.
About the Nursery
Based in Tenbury Wells, Worcestershire, Frank P. Matthews has a massive history in British fruit growing. They’ve been operating since 1901 and are responsible for growing a huge portion of the fruit trees sold across the country. They are specialists in grafting and have developed many of the varieties we see in gardens today.
If you are looking to order from them, their new bare-root stock usually becomes available for pre-order in late summer or early autumn. If you wait until winter to decide what you want, many of the best varieties or specific rootstocks are often sold out.
Collecting the Trees
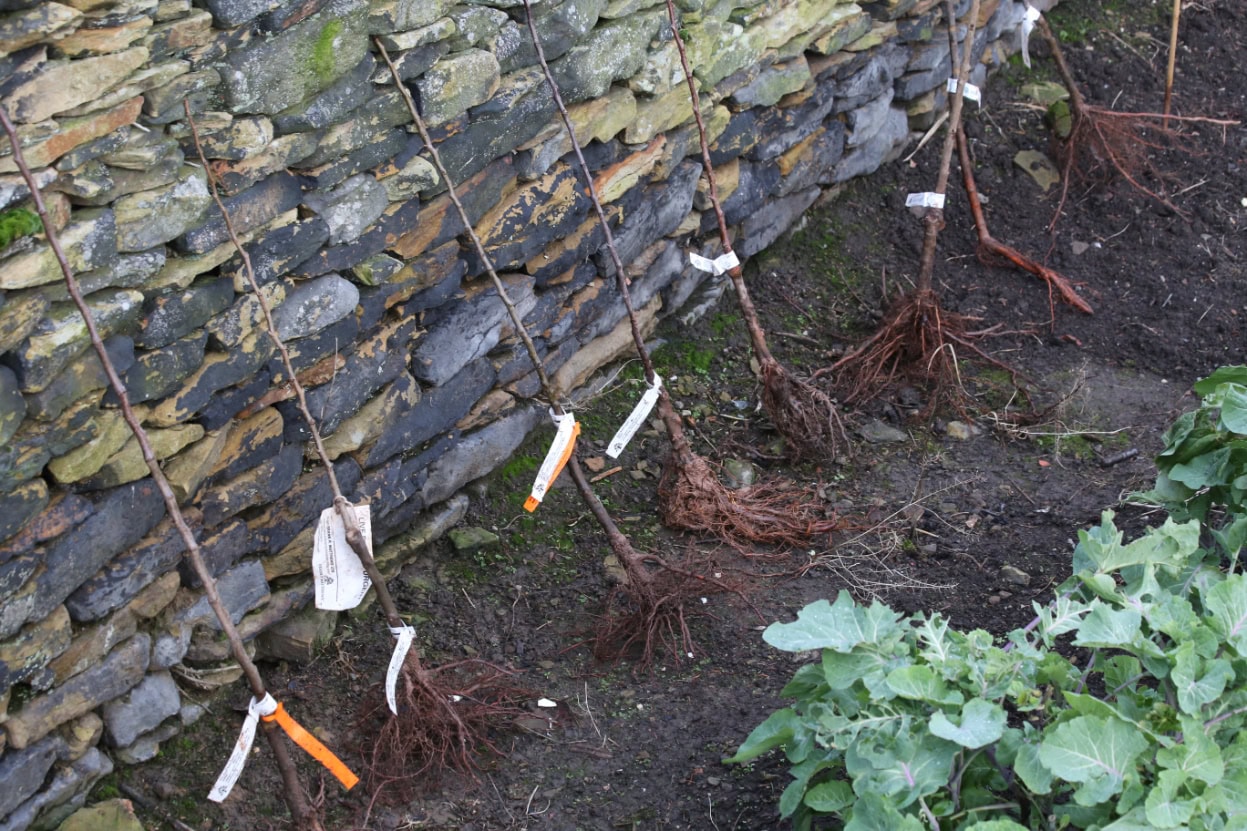
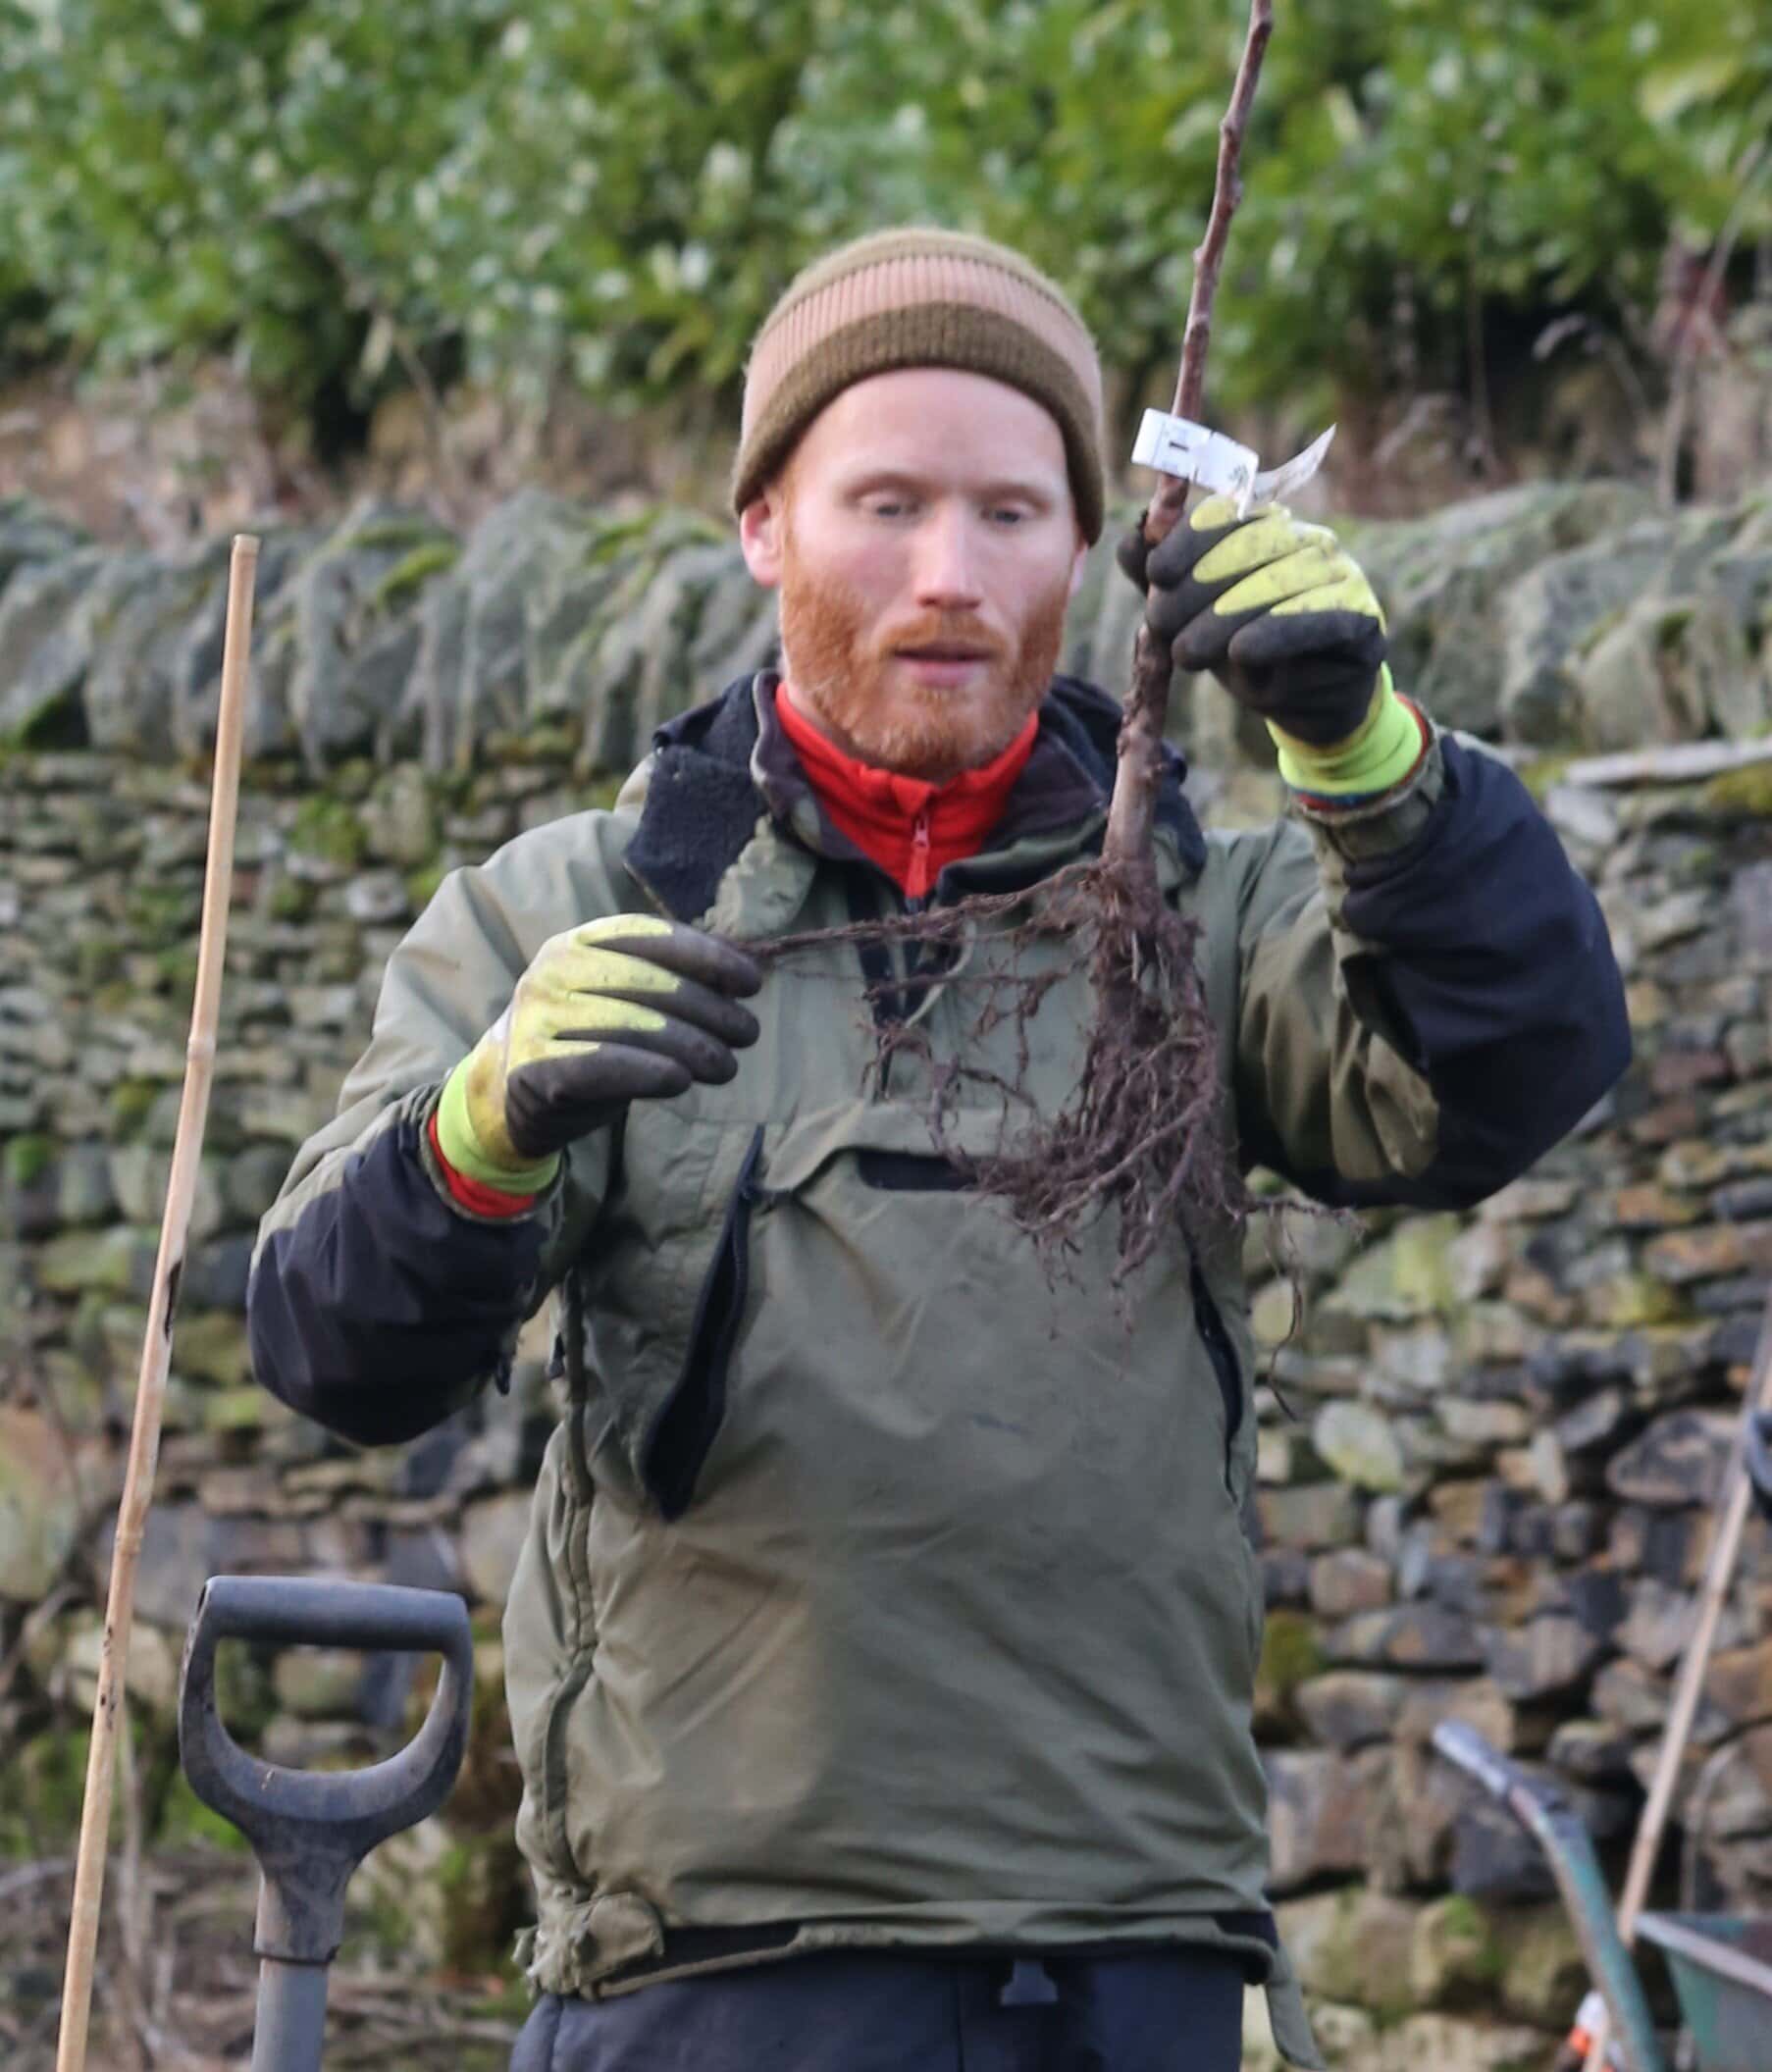
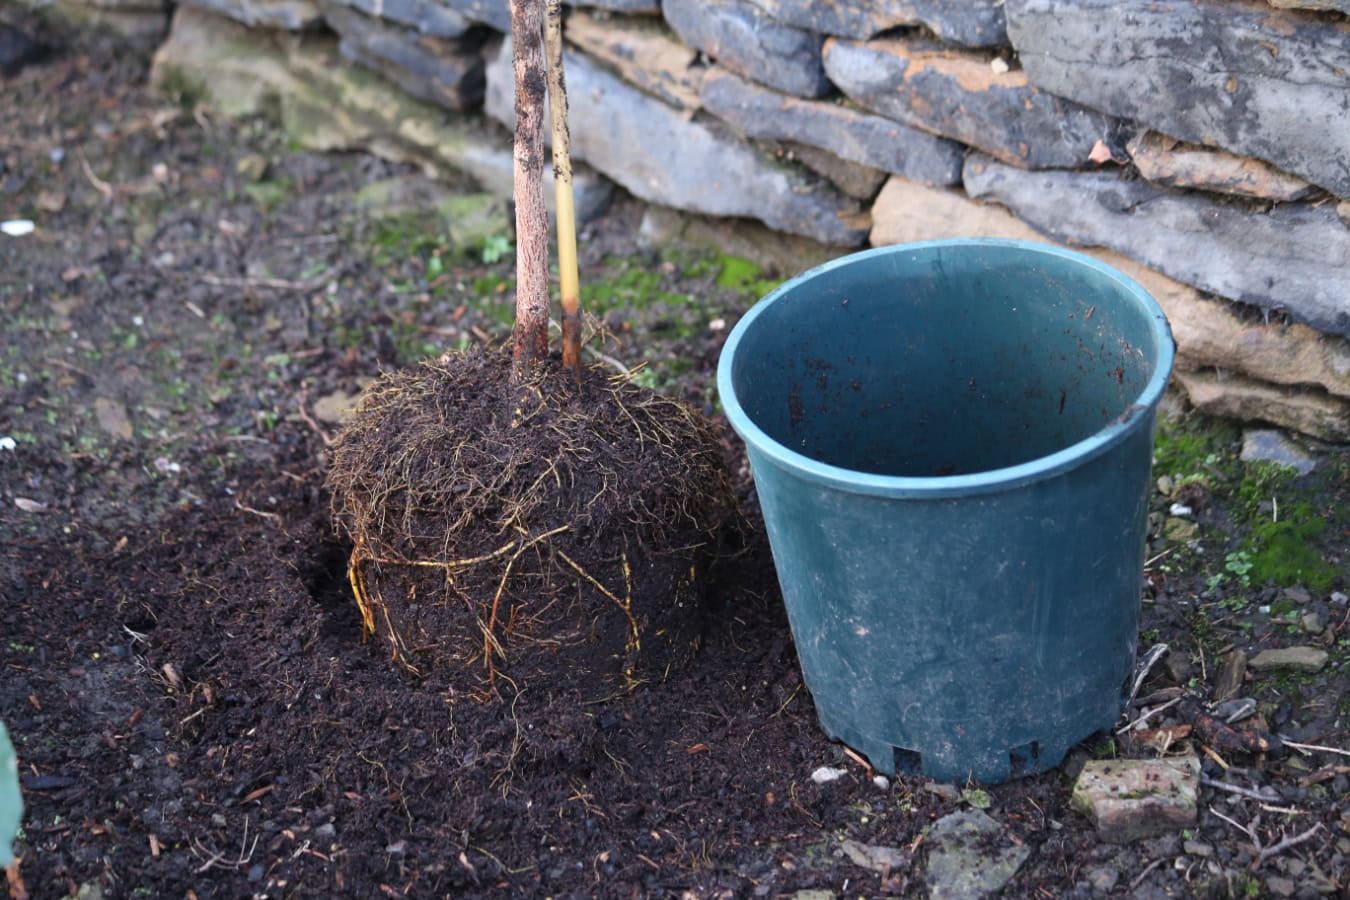
For this project, I chose 1-year-old bare root maidens. A “maiden” is simply a tree that has grown for one year after being grafted. They look like long, single whips rather than branched-out trees. These are the cheapest way to buy fruit trees, and because they are young, they tend to establish their root systems very quickly once planted.
We picked them up from the nursery en route back to Sheffield from visiting family in Swansea over Christmas. Arriving in the area in our campervan the night before, we spent the night in the car park of an ancient church. We woke up to a frosty morning, and I ran 7km along bridleways and footpaths roughly following the River Teme. The route took me through fields, woodlands and orchards, and right through the heart of the Frank P. Matthews production fields. Mistletoe grows in the highest abundance in the UK here, and ancient orchards sit right next to modern commercial ones. After an icy swim in the Teme at Tenbury Wells at the end of the run, my partner Mick picked me up in the campervan and we headed to the nursery shop to collect the trees.
Plant bare-root trees within few days, and keep their roots kept damp and protected from heat or frost until then. Three days later it was New Year’s Day. What better day to plant an orchard. Getting them in while they are fully dormant gives them the best start.
The Science of Planting a Tree: Why Deep Planting is a Problem
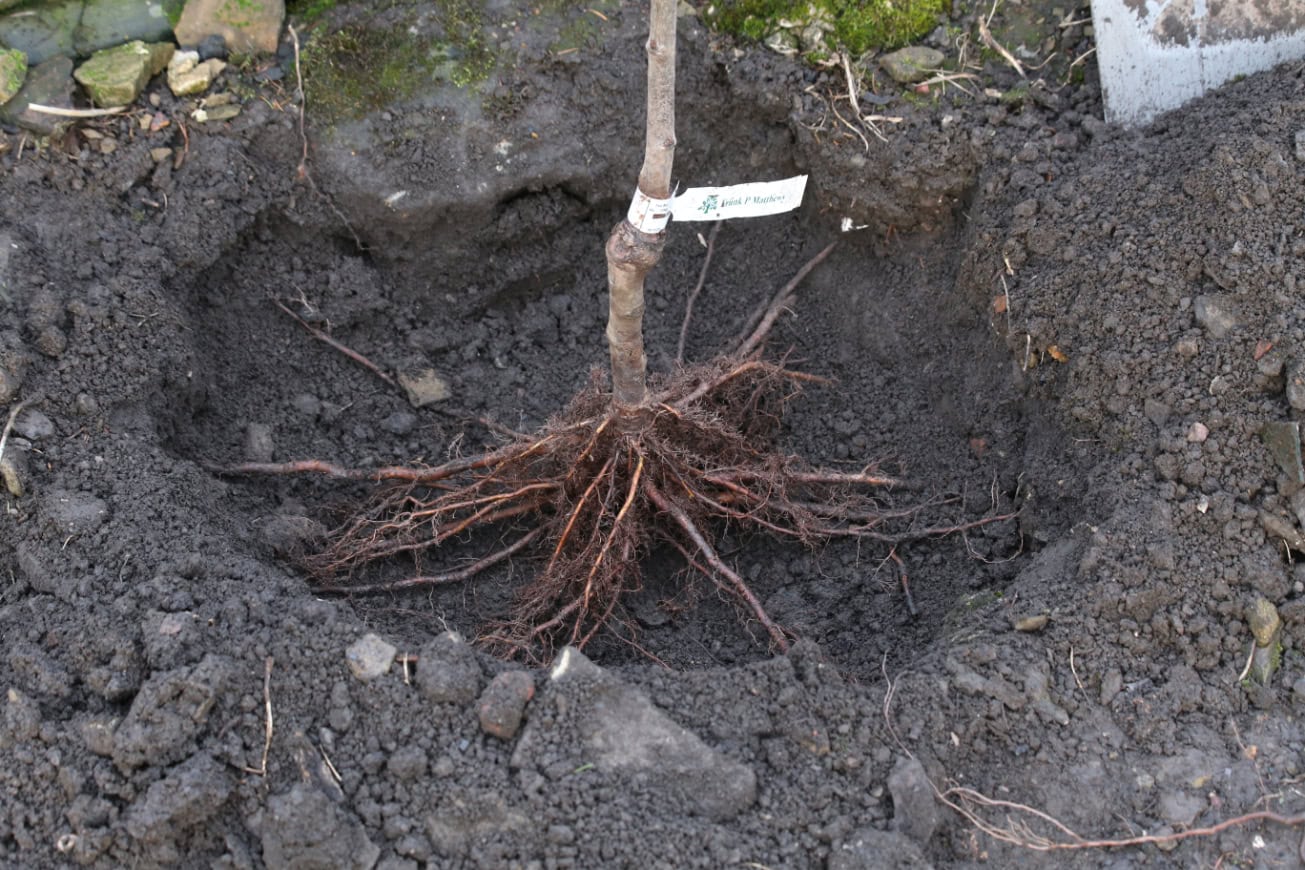
The most common mistake people make is planting too deep. I first learned the technical importance of this at RHS Wisley, where they emphasise planting with the root flare (the area where the roots join the trunk) slightly exposed. If you look at newly planted trees in Wisley, of which there are many, you’ll notice the root flare is always exposed.
Planting a tree: Why Deep Planting Happens
It usually occurs for a few reasons:
-
The “stability” myth: when planting a tree, people think burying the trunk deeper makes the tree sturdier against the wind. In reality, stability comes from lateral root spread, not trunk depth.
-
Soil settling: If you dig a hole deeper than the root ball and fill it with loose organic matter, the tree will physically sink as the air pockets collapse and the compost breaks down, pulling the trunk below the soil line.
- The “plant to the same depth as the pot” myth: You may think the top surface of the compost in the pot, should be flush with the soil level when planting. However, plants in pots are often mulched and potted slightly deeper each time they are potted up. Fibrous roots may have grown up into these surface compost layers, but the true root flare may be buried beneath layers of compost mulch.
The Biological Consequences
-
Gas exchange and suffocation: Roots require oxygen for cellular respiration. Soil oxygen levels are highest in the top 6–12 inches of soil. Tree roots are forced into anaerobic conditions when planted too deep. This leads to the production of ethanol and other toxins within the root tissue, essentially suffocating the tree.
-
Rotting of the base of the tree: Tree bark is not adapted to below-ground conditions. When constantly buried in soil, harmful types of fungi and bacteria eventually start to rot the bark and then enter deeper into the tree. This starts to compromise the movement of water and nutrients in the tree, and eventually the structural stability.
-
Graft reversion: In fruit trees, if the graft union is buried, the “scion” (the fruit variety) may develop its own roots. This bypasses the rootstock entirely, meaning you lose the dwarfing characteristics and disease resistance you paid for. With roses, however, buring the graft union is now best practice. But that’s for a another blog!
Steps for a Success when Planting a Tree
To ensure these trees don’t suffer from “transplant shock” or long-term decline, I followed the “Wisley-style” approach:
-
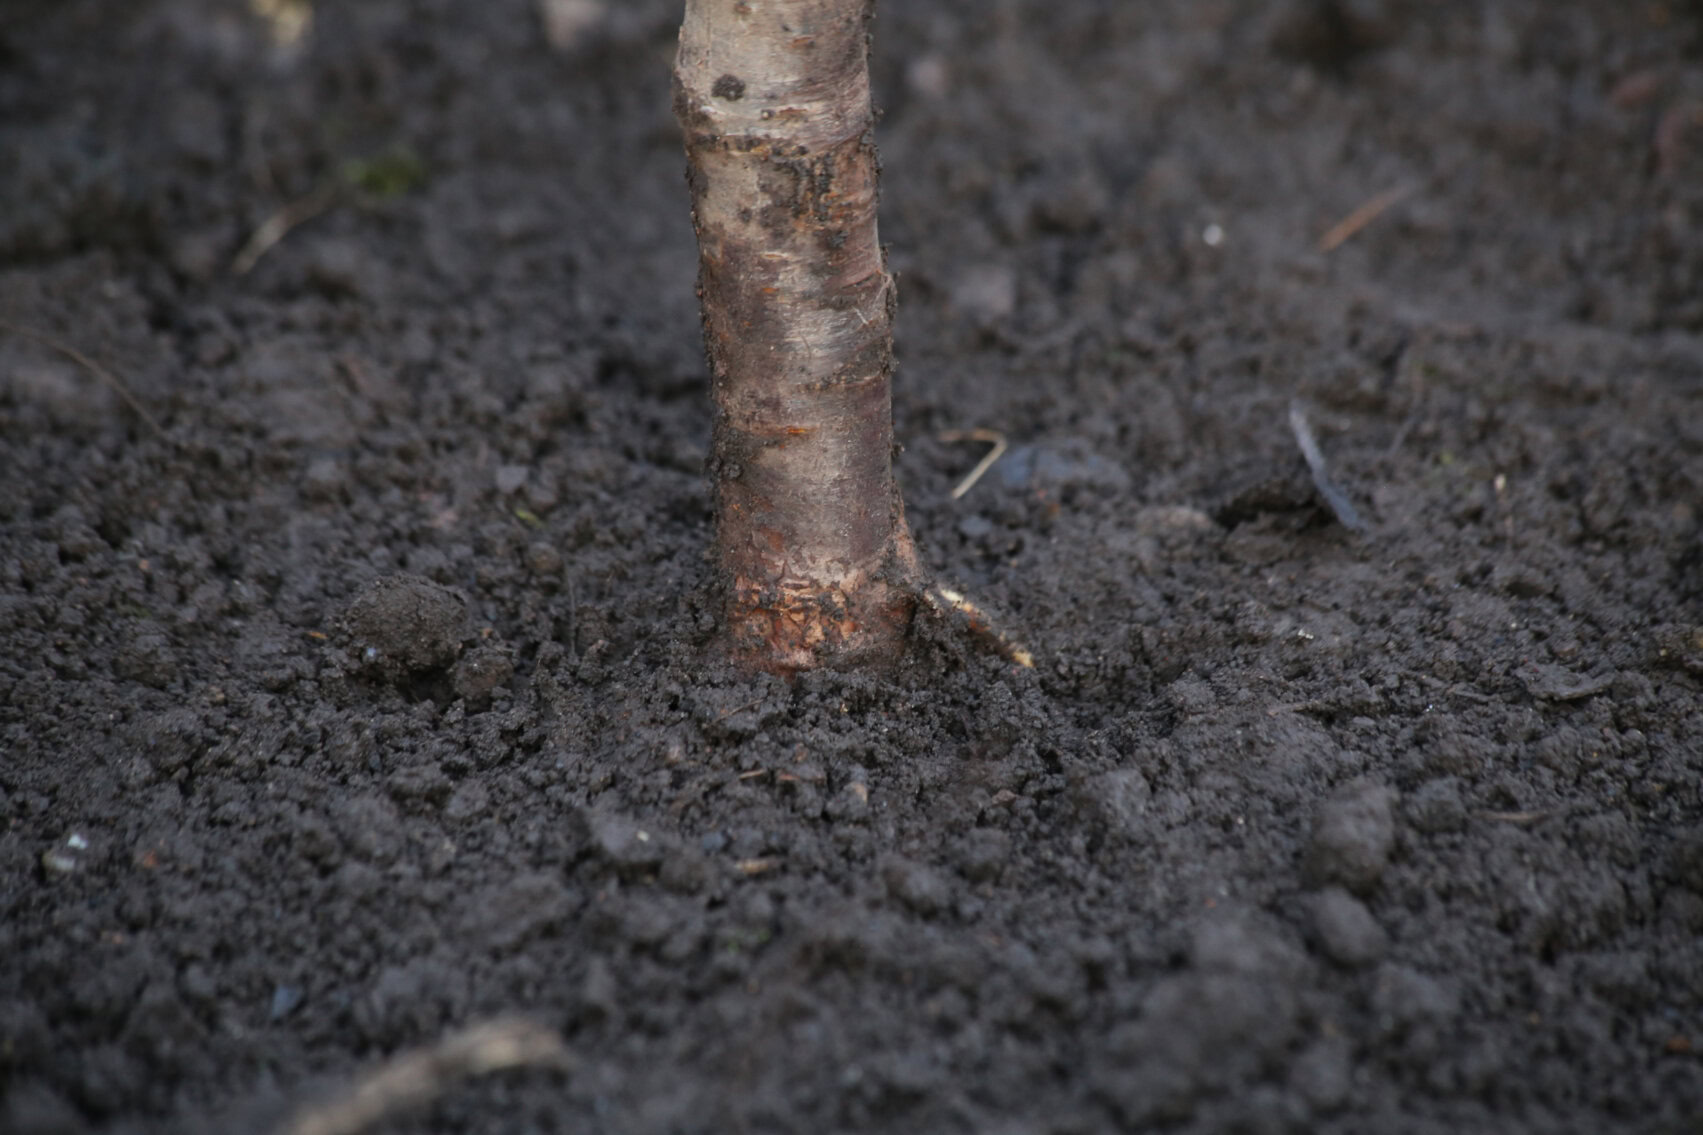
Locate the root flare: Don’t just trust the “nursery line” (the dirt mark on the stem). Gently brush away soil from the top of the roots until you find where the first main roots emerge from the trunk. This flare should be at or slightly above the soil surface when planting a tree.
-
Avoid adding compost or manure to the planting hole: This may come as a surprise, but this organic material is better added as a shallow surface mulch, where worms will work it into the soil naturally. Avoid mixing it with the soil in the hole when planting a tree. Compost decomposes and shrinks in volume, causing the tree to sink and become unstable.
- Dig the hole no deeper than the rootball: Err on the side of shallower rather than deeper. If you accidentally loosen the soil deeper down that needed, make sure to consolidate it (firm it down) with your heel to prevent it from sumping over time.

A hole no deeper than the rootball. -
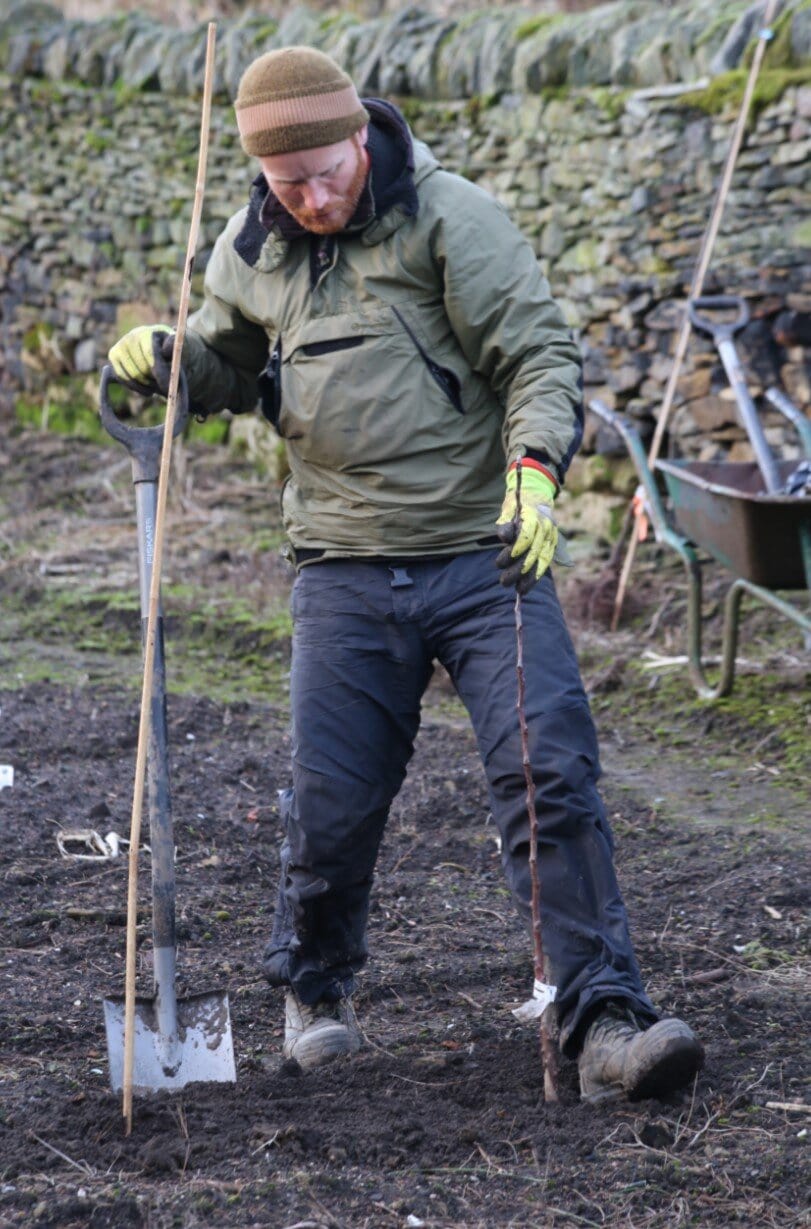
Use a planting bridge: Lay a bamboo cane across the hole, resting on the existing consolidated soil level on each side. This acts as a “level” to show exactly where the final soil surface will sit.
-
The mound method: Build a small mound of firm soil at the bottom of the hole and sit the tree on top of it. This prevents the tree from sinking later.

The root-flare exposed at the surface. -
Mind the graft: I kept the graft union (the lumpy part of the trunk) at least 2–3 inches above the soil to prevent the scion from rooting.
-
Firming in: I firmed the soil with my hands and then my heel to ensure good stability and root-to-soil contact, without compacting it so much that I excluded oxygen.

Firming in with a heel. My personal opinion is that you should not be too gentle! Plants are not happy if they’re rocking around in loose soil, and it reduces the need to stake young small trees, so they form their own strength from the get-go. - Make a donut: Any extra soil around the hole is used to make a donut shape. Water stays around the roots instead of flowing away across the surface.

A donut-ring to hold water. Even in winter, it’s good to water after planting to help settle the soil around the roots.

Now that they are in, the next job is to give a compost mulch. I will only stake them if they need it, so I’ll keep an eye for signs of rocking. I’ll also make sure to keep them watered in their first spring and summer, while they get their roots down.